Widespread Augmented Reality

Widespread Augmented Reality
Click on the image to get the Android Augmented Reality Heads up Display

Sunday, March 6, 2022

Successfully minted NFT to Ethereum Ropsten Network

Using only my linux laptop, I wanted to send an NFT to the Ethereum block chain in order to better understand the process. After checking out several on-line tutorials and failing, I went straight to the source and followed the steps in the following web pages:

    1. https://ethereum.org/en/developers/tutorials/how-to-write-and-deploy-an-nft/
    2. https://ethereum.org/en/developers/tutorials/how-to-mint-an-nft/
    3. https://ethereum.org/en/developers/tutorials/how-to-view-nft-in-metamask/

My previous attempts may have failed because there were too many steps including creating a web app on my laptop, starting localhost http://localhost:3000/, putting the NFT MetaData file at http://localhost:3000/api/erc721/, and then making that file available to the internet using ngrok. Somewhere in there, I am sure there was a typo or a piece missing.

The Ethereum tutorials uploaded the actual NFT image and the NFT meta data to Pinata so there was no need to open up my laptop to the internet. Moreover since I am not creating a production ready NFT, I used my own website at http://spideronfire.com to store the actual image and the meta data

Essentially this is what happens:

  • Create a smart contract
  • Make it Ethereum compliant with OpenZeppelin, Hardat and ethers
  • Connect to Ethereum through the Alchemy Node
  • Send the smart contract to the Alchemy node through your MetaMask wallet
  • Wait for Alchemy to validate the transaction
  • Get the contract address from Alchemy or https://ropsten.etherscan.io/
  • Mint the NFT using the contract address and a meta data file
  • The meta data file has a url to the actual image file

  • The following is a dump of the steps that I took so I can refer back to them after I forget what I did 5 minutes from now.
    1. Sign into Alchemy with google
    https://dashboard.alchemyapi.io/apps/d8wedo96vjsesxnw
    2. MetaMask Chrome extension connected to Ropsten Network
    Wallet funded with fake wei
    3. mkdir nft-project2
    4. cd nft-project2 and open terminal
    5. mya55@mya55:~/nft-project2$ npm init
    6. mya55@mya55:~/nft-project2$ npm install --save-dev hardhat
    7. mya55@mya55:~/nft-project2$ npx hardhat
    8. Select “create an empty hardhat.config.js”:
    9. mya55@mya55:~/nft-project2$ mkdir contracts
    10. mya55@mya55:~/nft-project2$ mkdir scripts
    11. Create contracts/MyNFT.sol and paste code
    12. remove the word Ownable on line 10 and onlyOwner on line 17 ?
    13. constructor() ERC721("SpiFiGen", "SFG")
    14. mya55@mya55:~/nft-project2/contracts$ npm install @openzeppelin/contracts
    15. mya55@mya55:~/nft-project2$ npm install dotenv --save
    16. create .env file in /nft-project2/
    17. Populate with Alchemy and MetaMask keys
    18. /nft-project2$ npm install --save-dev @nomiclabs/hardhat-ethers ethers@^5.0.0
    19. UPDATE HARDHAT.CONFIG.JS
    20. mya55@mya55:~/nft-project2$ npx hardhat compile
    21. Create /scripts/deploy.js
    22. mya55@mya55:~/nft-project2$ npx hardhat --network ropsten run scripts/deploy.js
    23. Compiled 1 Solidity file successfully
    Contract deployed to address: 0x157FCaD0869E00E1412C3af5C6AC21f7D22c8783
    24. https://ropsten.etherscan.io/
    25. END: https://ethereum.org/en/developers/tutorials/how-to-write-and-deploy-an-nft/
    26. Start: https://ethereum.org/en/developers/tutorials/how-to-mint-an-nft/
    27. mya55@mya55:~/nft-project2$ npm install @alch/alchemy-web3
    28. /scripts/ CREATE A MINT-NFT.JS FILE
    29. Code with ABI file location and contract address from etherscan.io
    30. contract: 0x157fcad0869e00e1412c3af5c6ac21f7d22c8783
    31. mintNFT("https://spideronfire.com/SpiFiGen/metadata.js")
    instead of IPFS Pinata upload
    32. node scripts/mint-nft.js
    33. The hash of your transaction is:
    0x86c7937597433eb4f9de36902081baf6849e2bbd6f0952730d8423a34ac360a2
    Check Alchemy's Mempool to view the status of your transaction!
    34. https://dashboard.alchemyapi.io/mempool
    35. Start https://ethereum.org/en/developers/tutorials/how-to-view-nft-in-metamask/
    36. Open MetaMask Android. Ropsten Network. Import NFT from contract address
    37. It WORKED!

    Tuesday, March 1, 2022

    Kali Linux Install Node

    Steps culled from https://www.freecodecamp.org/news/how-to-install-node-in-your-machines-macos-linux-windows/
  • Open terminal: curl -o- https://raw.githubusercontent.com/nvm-sh/nvm/v0.35.3/install.sh | bash
  • Close terminal
  • Open terminal: nvm ls
  • Same terminal: nvm install 12.18.1
  • Same terminal: nvm use 12.18.1
  • Same terminal: node -v
  • Uninstall Node: rm -rf $NVM_DIR ~/.npm ~/.bower

  • Thursday, February 24, 2022

    The SpiderOnFire NFT Drop Strategy

    This seems like a natural fit since the creator of W.A.R. (me under the purview of SpiderOnFire) envisioned dead drops as a possible application when first releasing the W.A.R. app in 2012.

    SpiderOnFire will be minting W.A.R. NFTs through its page https://spideronfire.com/makenft.php

    Here is how we would like to integrate the NFT world into our metaverse a.k.a. Widespread Augmented Reality (W.A.R.).

  • Drop SpiderOnFire NFTs under private handles at physical locations.
  • W.A.R. users within 3 miles of these locations will be able to tap on the NFT geotag in their heads up display and start a redeem process.
  • Still hashing out the redeem process.
  • Maybe the first user to tap on the NFT geotag will own it with a signed transaction sent to a blockchain.
  • Maybe subsequent taps will trigger a bid to buy the NFT geotag.
  • Still hashing out the incentive or motivation.
  • Perhaps this is finally a way to gamify and monetize the W.A.R. app.
  • Go ahead. Feel free to steal my idea.

    Monday, February 7, 2022

    Thursday, January 20, 2022

    Surge 2 - Metal Armor

    After 2 weeks of frustration trying to defeat the Metal Armor boss in Surge 2, I found this: https://cheatevolution.com/downloads.php

    Downloaded the file, unzipped the file, double clicked "CheatEvolution.exe", searched Surge 2, turned on unlimited health after starting the Steam game, and I finally got through the Metal Armor boss in Surge 2. Can't wait to use this tool to just complete the darn thing and uninstall it. I suck at poke, dodge and parry game play. Just don't have the patience nor is the repetition fun.

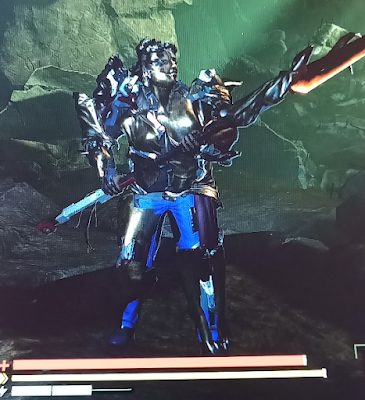
    This is me all armored up with a bad ass weapon, and I still suck

    Thursday, January 13, 2022

    How Big is 2**256 ( 2 to the power of 256)

    Excerpt from the book Programming Bitcoin by Jimmy Song

    How Big is 2**256?

    2**256 doesn’t seem that big because we can express it succinctly, but in reality, it is an enormous number. To give you an idea, here are some relative scales:
    2**256 ~ 10**77

  • Number of atoms in and on Earth ~ 10**50
  • Number of atoms in the solar system ~ 10**57
  • Number of atoms in the Milky Way ~ 10**68
  • Number of atoms in the universe ~ 10**80

  • A trillion (10**12) computers doing a trillion computations every trillionth (10 **–12) of a second for a trillion years is still less than 10**56 computations. Think of finding a private key this way: there are as many possible private keys in Bitcoin as there are atoms in a billion galaxies.

    Friday, January 7, 2022

    Kali Linux Add HP Printer

  • First of all going here: https://support.hp.com/us-en/document/c01174360 did not work.
  • Followed these steps from here: https://subba-lakshmi.medium.com/how-to-install-and-configure-printers-on-kali-linux-78a0476b3cfe
  • sudo apt-get install cups cups-client "foomatic-db"
  • sudo /usr/sbin/adduser root lpadmin
  • sudo /usr/sbin/adduser s33me lpadmin
  • sudo service cups restart
  • sudo systemctl enable cups
  • sudo systemctl start cups
  • Navigate to http://127.0.0.1:631/
  • [Administration] [add printer]
  • The only snafu was setting the default print settings to "draft-grayscale". This caused a "filter" error. After specifying print quality as "normal", my text document printed out; however, I do not want to spend a great deal of ink printing out test code. Naturally, I will eventually have to find a way to print at draft quality, or reboot into Windows and print from there.